MongoDB Sharding: Concepts, Examples & Tutorials

This comprehensive article explores sharding in MongoDB. We break the article into two sections:
(This article is part of our MongoDB Guide. Use the right-hand menu to navigate.)
Sharding is the process of distributing data across multiple hosts. In MongoDB, sharding is achieved by splitting large data sets into small data sets across multiple MongoDB instances.
When dealing with high throughput applications or very large databases, the underlying hardware becomes the main limitation. High query rates can stress the CPU, RAM, and I/O capacity of disk drives resulting in a poor end-user experience.
To mitigate this problem, there are two types of scaling methods.
Vertical scaling is the traditional way of increasing the hardware capabilities of a single server. The process involves upgrading the CPU, RAM, and storage capacity. However, upgrading a single server is often challenged by technological limitations and cost constraints.
This method divides the dataset into multiple servers and distributes the database load among each server instance. Distributing the load reduces the strain on the required hardware resources and provides redundancy in case of a failure.
However, horizontal scaling increases the complexity of underlying architecture. MongoDB supports horizontal scaling through sharding—one of its major benefits, as we’ll see below.
MongoDB sharding works by creating a cluster of MongoDB instances consisting of at least three servers. That means sharded clusters consist of three main components:
A shard is a single MongoDB instance that holds a subset of the sharded data. Shards can be deployed as replica sets to increase availability and provide redundancy. The combination of multiple shards creates a complete data set. For example, a 2 TB data set can be broken down into four shards, each containing 500 GB of data from the original data set.
Mongos act as the query router providing a stable interface between the application and the sharded cluster. This MongoDB instance is responsible for routing the client requests to the correct shard.
Configuration servers store the metadata and the configuration settings for the whole cluster.
The following diagram from the official MongoDB docs explains the relationship between each component:
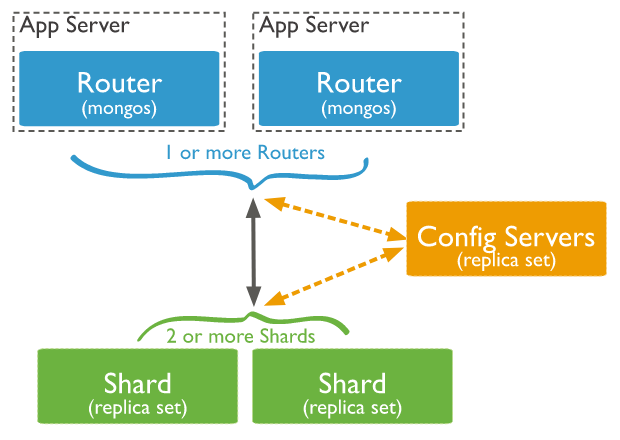
It’s important to remember that the config servers also work as replica sets.
When sharding a MongoDB collection, a shard key gets created as one of the initial steps. The “shard key” is used to distribute the MongoDB collection’s documents across all the shards. The key consists of a single field or multiple fields in every document. The sharded key is immutable and cannot be changed after sharding. A sharded collection only contains a single shard key.
When sharding a populated collection, the collection must have an index that starts with the shard key. For empty collections that don’t have an appropriate index, MongoDB will create an index for the specified shard key.
The shard key can directly have an impact on the performance of the cluster. Hence can lead to bottlenecks in applications associated with the cluster. To mitigate this, before sharding the collection, the shard key must be created based on:
Chunks are subsets of shared data. MongoDB separates sharded data into chunks that are distributed across the shards in the shared cluster. Each chunk has an inclusive lower and exclusive upper range based on the shard key. A balancer specific for each cluster handles the chunk distribution.
The balancer runs as a background job and distributes the chunks as needed to achieve an even balance of chunks across all shards. This process is called even chuck distribution.
Now that we’ve got the concept down, let’s look at benefits and limitations of sharding in MongoDB:
Now that we understand the concepts of sharding, let’s get started with some tutorials.
The following steps demonstrate how to set up a sharded cluster can on three servers. Ubuntu 20.04 LTS and MongoDB 4.4.1 are installed on all three servers. We can define servers as shown below:
Now, we’ll walk you through several actions, including how to:
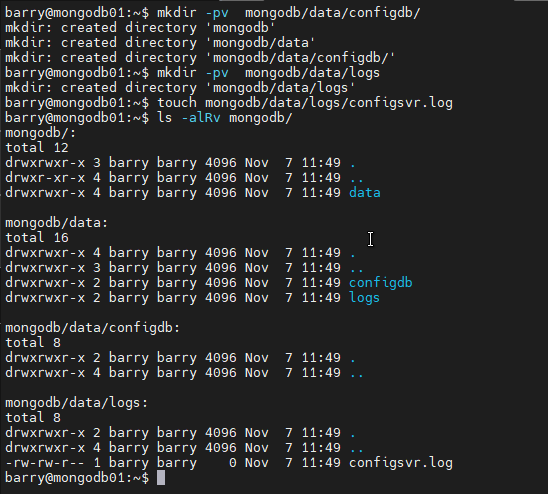
Create the directory structure for the database and log file.
mkdir -pv  mongodb/data/configdb/
mkdir -pv  mongodb/data/logs
touch mongodb/data/logs/configsvr.log
ls -alRv mongodb/
 Create the config file. When you execute the above commands, a config file will be created along with those directories. Next, open the config file and assign the port and the IP address of the server. Also, don’t forget to set the cluster role as configsvr.
sudo nano /etc/mongodConfig.conf
File - mongodConfig.conf
storage:
  dbPath: /home/barry/mongodb/data/configdb
  journal:
  enabled: true

systemLog:
  destination: file
  logAppend: true
  path: /home/barry/mongodb/data/logs/configsvr.log

net:
  port: 27019
  bindIp: 10.10.10.56

sharding:
  clusterRole: configsvr

replication:
  replSetName: ConfigReplSet
Start the config server. Now, you can start the config server with the following command.
mongod --config /etc/mongodConfig.conf&
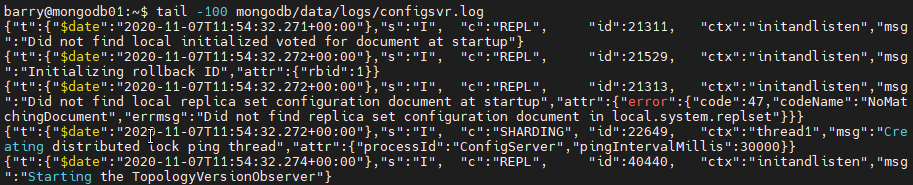
 Check the logs to verify if the server is running.
tail -100 mongodb/data/logs/configsvr.log
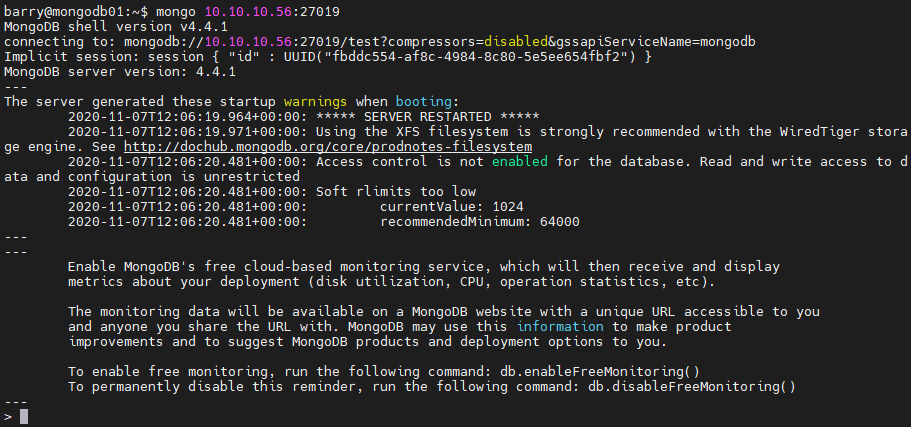
 Connect to the config server.
mongo 10.10.10.56:27019
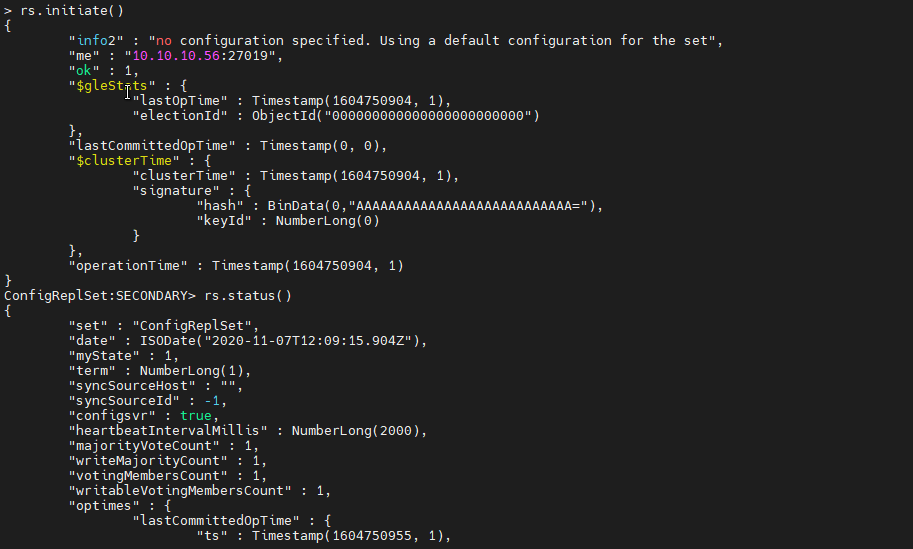
 Initiate the Config Server. You can use the initiate() function to initiate the config server with the default configuration. Then check the status of the server with the status() function.
rs.initiate()
rs.status()
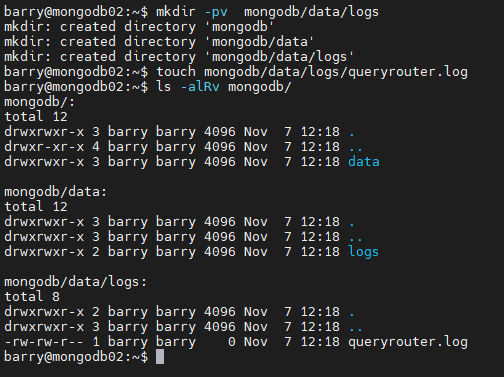
Create the directory structure and an empty log file.
mkdir -pv  mongodb/data/logs
touch mongodb/data/logs/mongorouter.log
ls -alRv mongodb/
 Create the config file. To create the query router, we provide the log location, IP, and port of the server instance. Further, we need to define the config server to which this query router belongs.
sudo nano /etc/mongoRouter.conf
File - mongoRouter.conf
systemLog:
  destination: file
  logAppend: true
  path: /home/barry/mongodb/data/logs/queryrouter.log

net:
  port: 27017
  bindIp: 10.10.10.57

sharding:
  configDB: ConfigReplSet/10.10.10.56:27019
Start the query router with the mongos command.
mongos --config /etc/mongoRouter.conf&
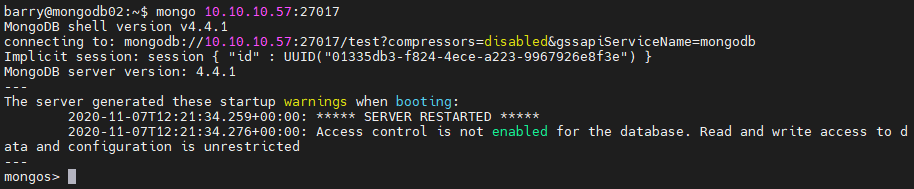
Check if the query router instance is reachable.
mongo 10.10.10.57:27017
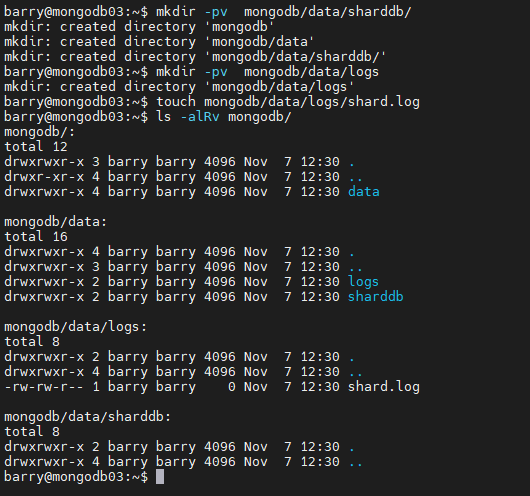
Create the directory structure and the log file.
mkdir -pv  mongodb/data/sharddb/
mkdir -pv  mongodb/data/logs
touch mongodb/data/logs/shard.log
ls -alRv mongodb/
 Create the config file. The shard’s config file contains the paths for the database storage, logs, and sharding cluster role, which is set to shardsvr. It also includes the network settings to the server instance. Finally, we have set replSetName allowing the data to be replicated.
sudo nano /etc/mongodShard.conf
File - mongoShard.conf
storage:
  dbPath: /home/barry/mongodb/data/sharddb
  journal:
    enabled: true

systemLog:
  destination: file
  logAppend: true
  path: /home/barry/mongodb/data/logs/shard.log

net:
  port: 27018
  bindIp: 10.10.10.58

sharding:
  clusterRole: shardsvr

replication:
  replSetName: ShardReplSet
Start the shard server.
mongod --config /etc/mongodShard.conf&
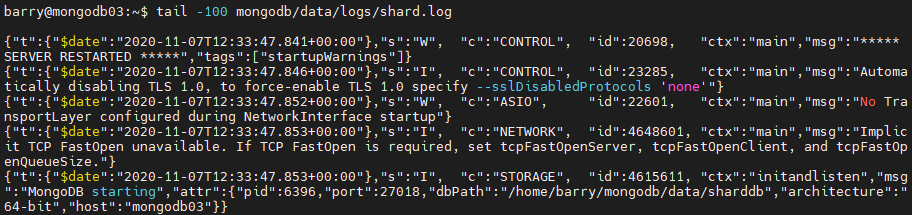
 Check the logs to verify if the server is running.
tail -100 mongodb/data/logs/shard.log
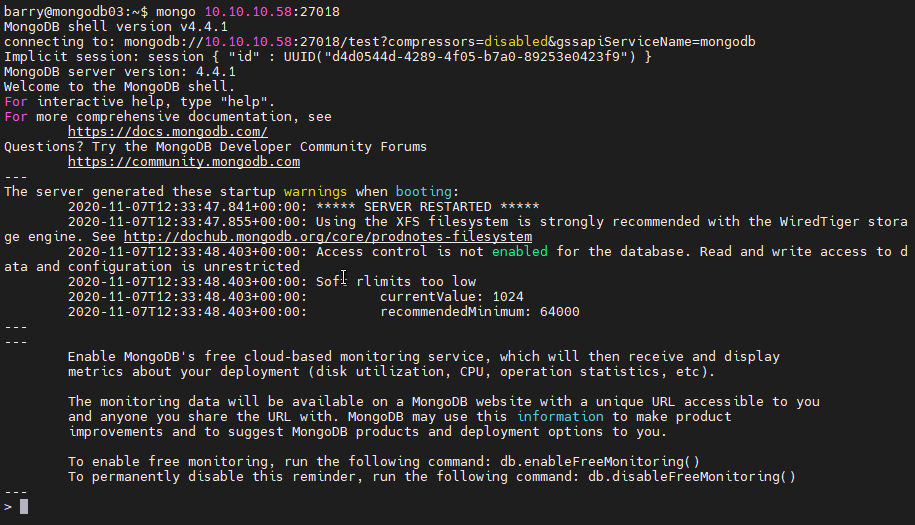
 Login to the shard server.
mongo 10.10.10.58:27018
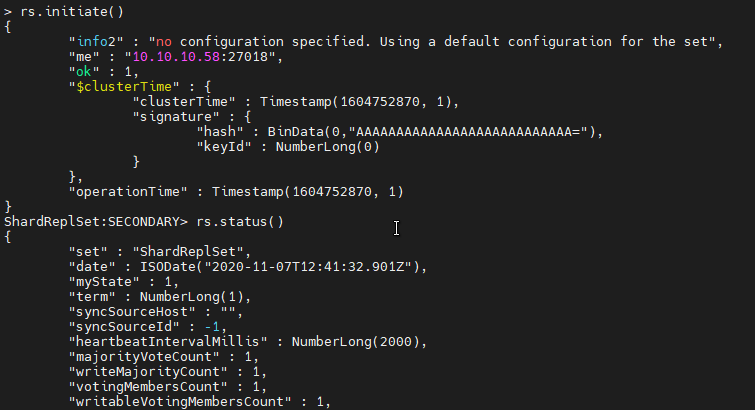
 Initiate the shard server. The replication with the default configuration is enabled using the initiate() function. Then check the status of the initialization with the status() function.
rs.initiate()
rs.status()
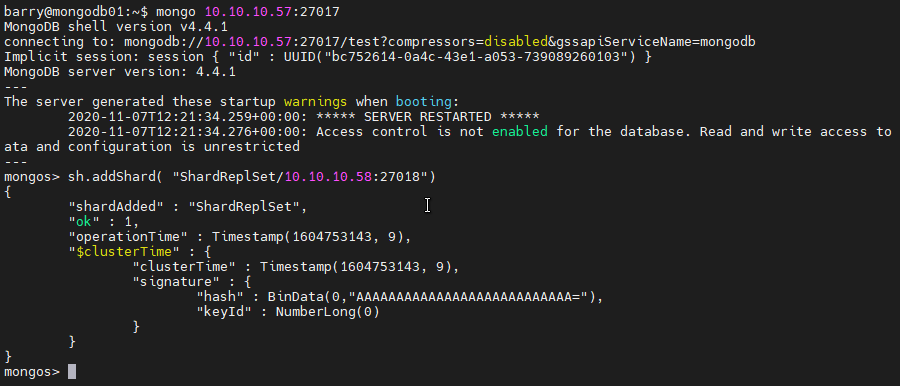
Connect to the Query Router.
mongo 10.10.10.57:27017
Add the Shard to the clustet. Using the addShard() command, we provide the replSetName with the IP address and the port of the shard instance.
sh.addShard( "ShardReplSet/10.10.10.58:27018")
Create the database. A database named “persons” will be created using the query router. This database will be used in the sharding operation. Here the necessary steps to enable sharding:
use persons
sh.enableSharding("persons")
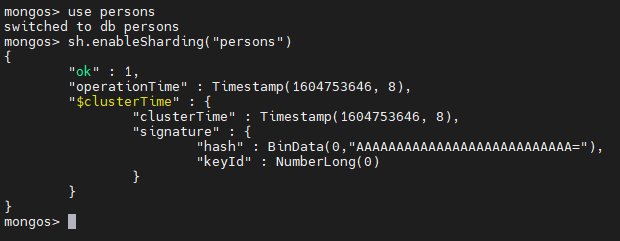 Check sharding status. Using the status() command, we check if the sharding is enabled to the database. As shown below, sharding is enabled on the “persons” database.
sh.status()

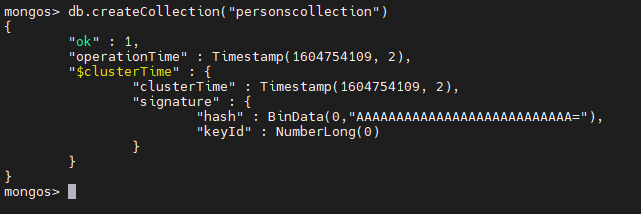
In this section, we will create a MongoDB collection and an index called person_id to be used as the shard key. The data in the collection will be sharded using the collection and the shard key.
Create the collection.
db.createCollection("personscollection")
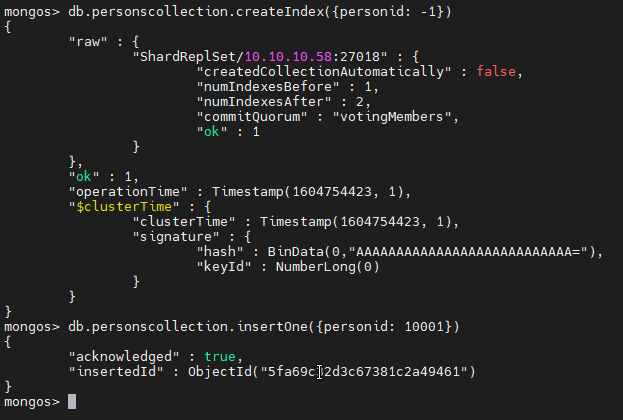
 Create the index and add a record. Create the index with personid as the field in descending order.
db.personscollection.createIndex({personid: -1})
Add a personid with value 10001.
db.personscollection.insertOne({personid: 10001})
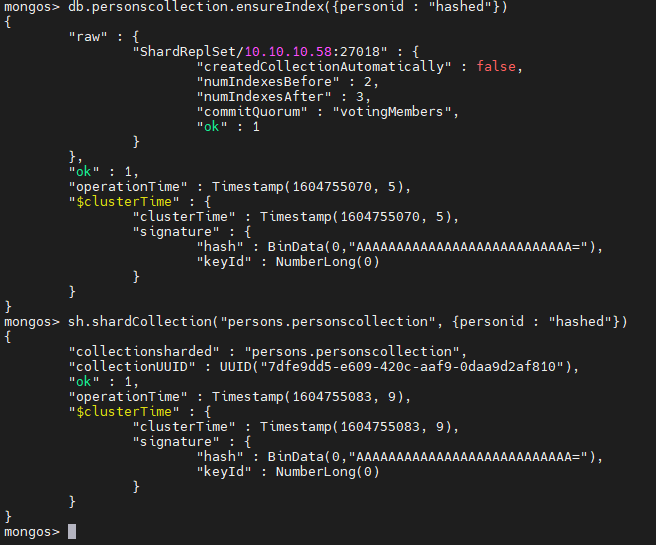
The first step is to make sure the index personid is hashed. If not, this will result in an error, and sharding will fail.
To achieve this, we use ensureIndex() function within MongoDB.
db.personscollection.ensureIndex({personid : "hashed"})
If the index is used correctly, we can enable Sharding with “personid” as the shard key.
sh.shardCollection("persons.personscollection", {personid : "hashed"})
If the operation is successful, the following output will be displayed.
 Verify if sharding is working as intended. Use the getShardDistribution() command to verify the status of the sharding operation.
db.personscollection.getShardDistribution()
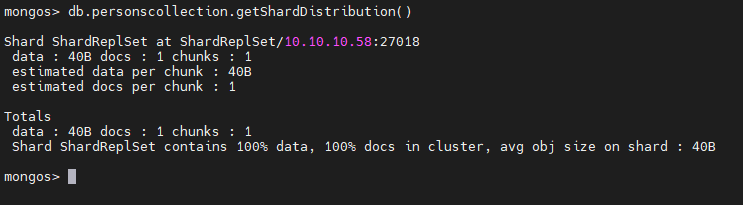 The above output describes that the personscollection is sharded in the ShardRepSet on the Shard server (10.10.10.58). It consists of a single document in a single chunk. The available document is the single record we entered into the collection.
MongoDB sharding is a method to manage large data sets efficiently by distributing the workload across many servers without having any adverse effects on the overall performance of the database. Also, sharding provides the ability to efficiently scale the cluster for future requirements without a complex restructuring of the underlying hardware infrastructure.