Mongorestore Examples for Restoring MongoDB Backups

It is essential to have an efficient and reliable data restoration method after backing up data during the backup and restore process. Consider the differences:
The mongorestore command is the sister command of the mongodump command. You can restore the dumps (backups) created by the mongodump command into a MongoDB instance using the mongorestore command.
In this article, you will learn how to utilize the mongorestore command to restore MongoDB backups effectively.
(This article is part of our MongoDB Guide. Use the right-hand menu to navigate.)
mongorestore is a simple utility that is used to restore backups. It can load data from either:
Starting with MongoDB 4.4, the mongorestore utility is not included in the base MongoDB server installation package. Instead, it’s distributed as a separate package within the MongoDB Database Tools package. This allows the utility to have a separate versioning scheme starting with 100.0.0.
The mongorestore utility offers support for MongoDB versions 4.4, 4.2, 4.0, and 3.6. It may also work with earlier versions of MongoDB, but compatibility is not guaranteed.
Additionally, mongorestore supports a multitude of platforms and operating systems ranging from x86 to s390x; you can see the full compatibility list in the official documentation.
Here is a list of things you need to know about the Mongo restore command and behaviors of the mongorestore utility.
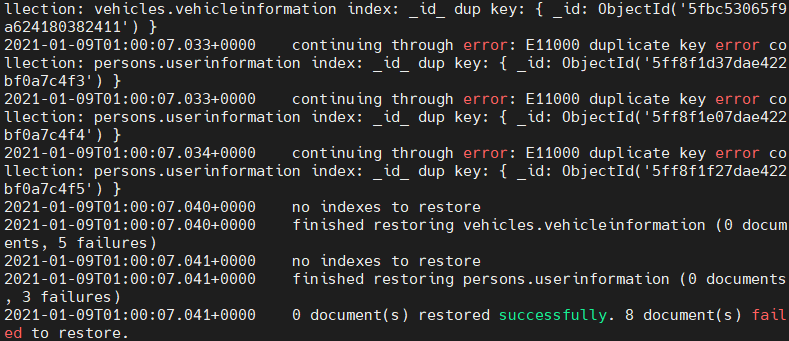
This will lead to a duplicate key error during the restoration process, as shown here:
In this section, you will find out the basic usage of the mongorestore utility in a standalone MongoDB instance.
mongorestore <options> <connection-string> <directory or file to restore>
The basic way to restore a database is to use the mongorestore command to specify the backup directory (dump directory) without any options. This option is suitable for databases located in the localhost (127.0.0.1) using the port 27017. The restore process will create new databases and collections as needed and will also log its progress.
mongorestore ./dump/
Result:
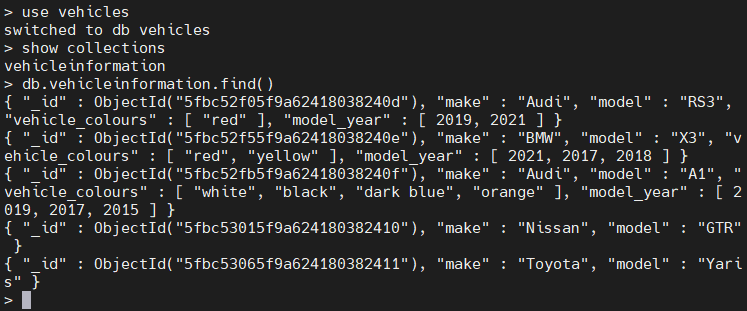
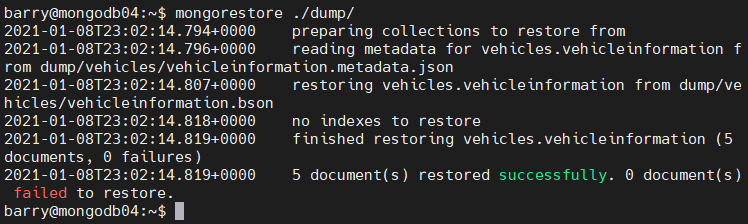 In the above example, you can see how to successfully restore the “vehicles” database with all its collections and documents. This will create a new database named vehicles in the MongoDB instance containing all the collections and documents of the backup. You can verify the restoration process by logging into the MongoDB instance.
use vehicles
show collections
db.vehicleinformation.find()
Result:
In order to restore data into a remote MongoDB instance, you need to establish the connection. The connection to a database can be specified using either:
Connecting using the URI option:
mongorestore --uri="mongodb://<host URL/IP>:<Port>"
Connecting using the host option:
mongorestore --host="<host URL/IP>:<Port>"
Connecting using host and port options:
mongorestore --host="<host URL/IP>" --port=<Port>
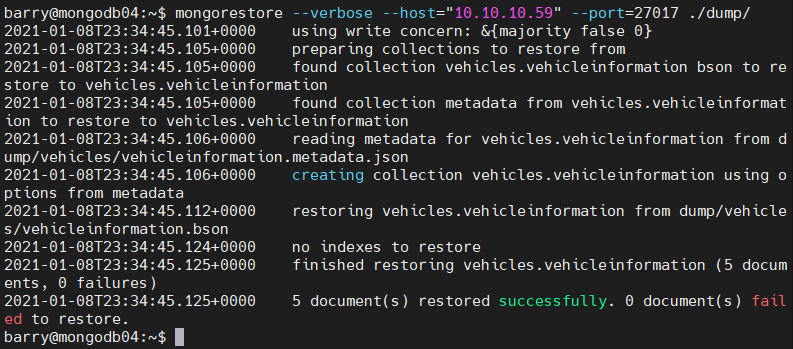
The mongostore example below shows you how to restore a backup of the remote MongoDB instance. The verbose option will provide users with a detailed breakdown of the restoration process.
mongorestore --verbose --host="10.10.10.59" --port=27017 ./dump/
Result:
When connecting to an access-controlled MongoDB instance, you need to provide:
Additionally, mongorestore supports key-based authentications. It is necessary to ensure that the authenticated user has the required permissions/roles in carrying out the restoration process.
Authentication syntax:
mongorestore --authenticationDatabase=<Database> -u=<Username> -p=<Password>
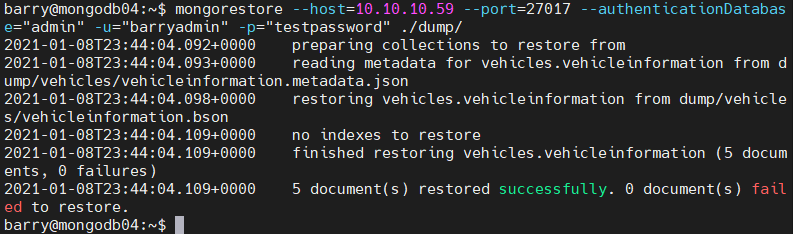
The following restoration command shows how to connect to a remote MongoDB server using the username and password for authentication.
mongorestore --host=10.10.10.59 --port=27017 --authenticationDatabase="admin" -u="barryadmin" -p="testpassword" ./dump/
Result:
Using the –nsInclude option, users can specify which database or collection needs to be restored. When using the –nsInclude option, you can use the namespace pattern (Ex: “vehicles.*”, “vehicles.vehicleInformation”) to define which database or collection should be included.
To specify multiple namespaces, you can use the –nsInclude command multiple times in a single command. The -nsInclude command also supports wildcards to be added in the defined namespace.
The –db and –collection options are deprecated and will result in the following error.
 To exclude a database or a collection, you can use the –nsExclude command.
Selecting a Database/Collection:
mongorestore --nsInclude=<namespace> (${DATABASE}.${COLLECTION})
Excluding a Database/Collection:
mongorestore --nsExclude=<namespace> (${DATABASE}.${COLLECTION})
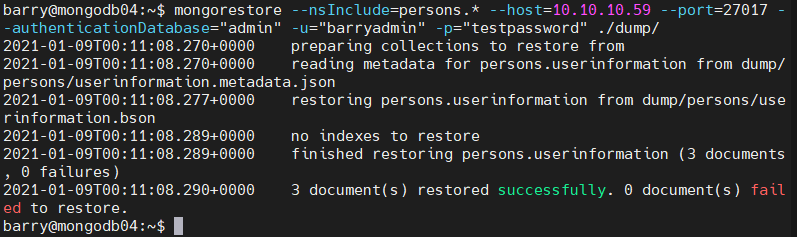
In the following example, you will see how to restore the complete “persons” database. You can include the whole database by specifying the “persons” namespace with the asterisk as a wild card pattern. This will restore all the data within the database.
mongorestore --nsInclude=persons.* --host=10.10.10.59 --port=27017 --authenticationDatabase="admin" -u="barryadmin" -p="testpassword" ./dump/
Result:
The mongorestore utility supports restorations from an archive file. The –archive option can be used to select the archive file, and the –nsInclude and –nsExclude options can be used in conjunction with the archive option.
mongorestore --archive=<file>
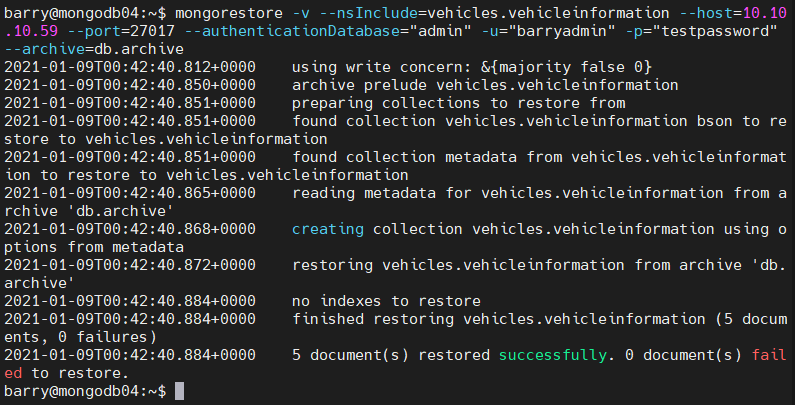
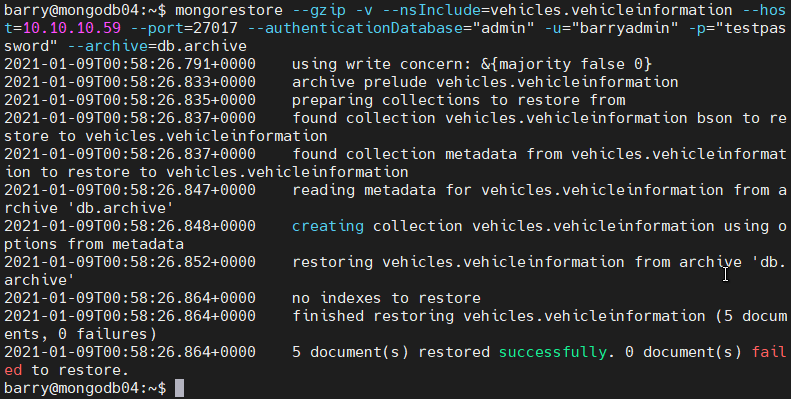
The below example illustrates how to define an archive file when restoring data. The –nsInclude option is used to specify which collection is to be restored to the database from the archive file.
mongorestore -v --nsInclude=vehicles.vehicleinformation --host=10.10.10.59 --port=27017 --authenticationDatabase="admin" -u="barryadmin" -p="testpassword" --archive=db.archive
Result:
The mongodump utility uses the –gzip option to compress the individual JSON and BSON files. These compressed backups can also be used to restore the database. The compressed file can also be filtered using the –nsInclude and –nsExclude options.
mongorestore --gzip
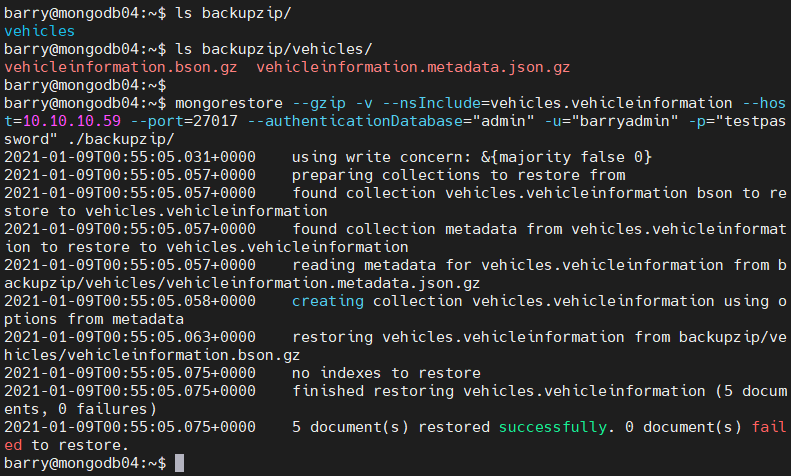
You can restore a compressed MongoDB backup using the following commands. The compressed backup is stored in the “backupzip” directory.
mongorestore --gzip -v --nsInclude=vehicles.vehicleinformation --host=10.10.10.59 --port=27017 --authenticationDatabase="admin" -u="barryadmin" -p="testpassword" ./backupzip/
Result:
 The same process can be applied to a compressed archive file. The below mongostore example shows how to restore data from a compressed archive file.
mongorestore --gzip -v --nsInclude=vehicles.vehicleinformation --host=10.10.10.59 --port=27017 --authenticationDatabase="admin" -u="barryadmin" -p="testpassword" --archive=db.archive
Result:
The mongostore command “mongorestore” enables users to read data from standard inputs and use that data in the restoration process. You can read the data by providing the –archive option without the filename.
mongodump --archive | mongorestore –archive
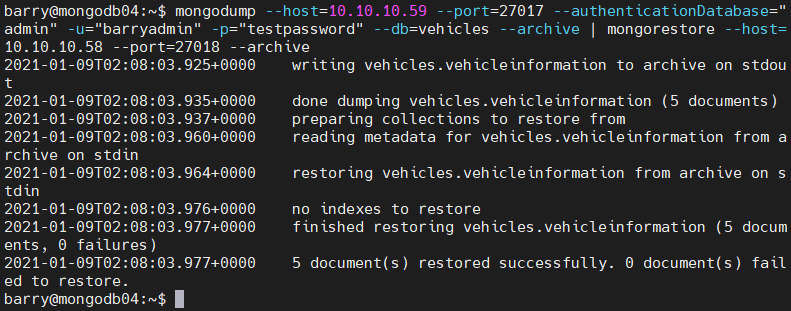
The following example shows how to create a backup from a secure MongoDB database using mongodump and pass it as standard input to the mongorestore command to be restored in an insecure remote MongoDB instance.
mongodump --host=10.10.10.59 --port=27017 --authenticationDatabase="admin" -u="barryadmin" -p="testpassword" --db=vehicles --archive | mongorestore --host=10.10.10.58 --port=27018 --archive
Result:
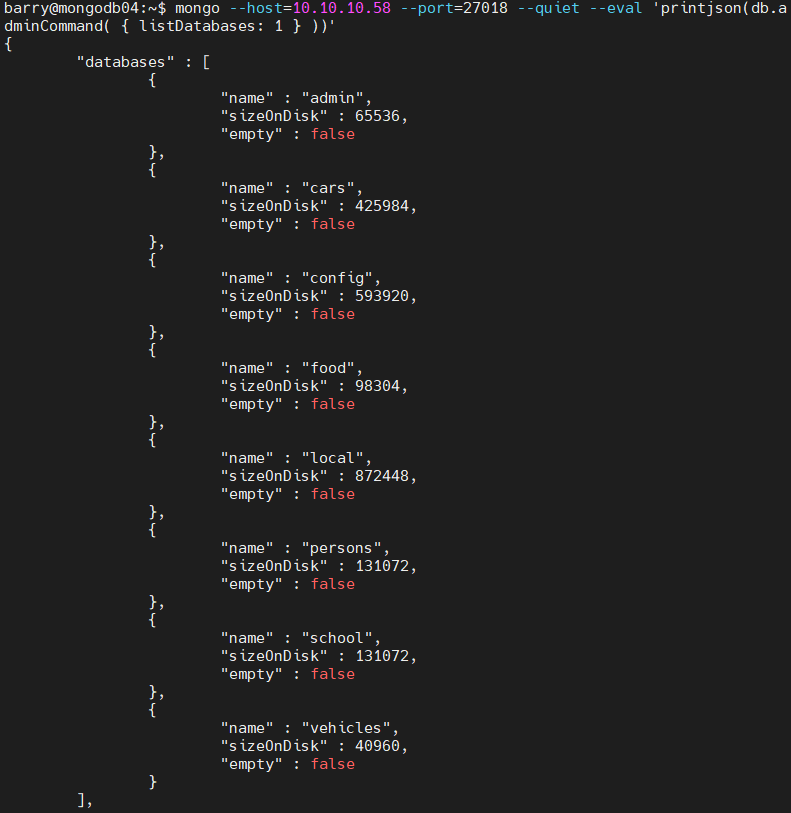
 You can verify the restoration process by checking the databases with the remote server. This can be done by executing a JavaScript code using –eval tag. Using the “listDatabases” admin command, you will be able to list all the databases within the remote MongoDB instance.
mongo --host=10.10.10.58 --port=27018 --quiet --eval 'printjson(db.adminCommand( { listDatabases: 1 } ))'
Result:
This tutorial offers in-depth knowledge about the MongoDB mongorestore utility and how it can be used to restore backups created by mongodump. The mongorestore offers a convenient and efficient way of restoring database backups.
The combination of mongodump with mongorestore provides small scale database administrators with a complete backup strategy.