Enhancing Load Testing Effectiveness: Unleashing the Power of the JMeter Simple Table Server

JMeter is a popular open-source tool used for performance testing, load testing, and functional testing of web applications. One of the lesser-known features of JMeter is the Simple Table Server (STS), which allows you to store and retrieve test data in a simple tabular format. In this blog post, we'll explore how to implement the STS.
The STS is a server application that allows you to store and retrieve test data in a tabular format. It provides a simple and easy-to-use interface for creating and managing test data, which can be used in your JMeter test plans. You can store data in tables and use them to simulate real-world scenarios, such as user login credentials, product information, and customer details.
Consider a scenario where you have 40 thread groups that are using unique user logins. Moreover, you have a distributed JMeter setup with five secondary machines. In this case, you will have to manually split users and copy those files to each secondary machine. so, you end up having 200 input files (40 files for each node equals 200).
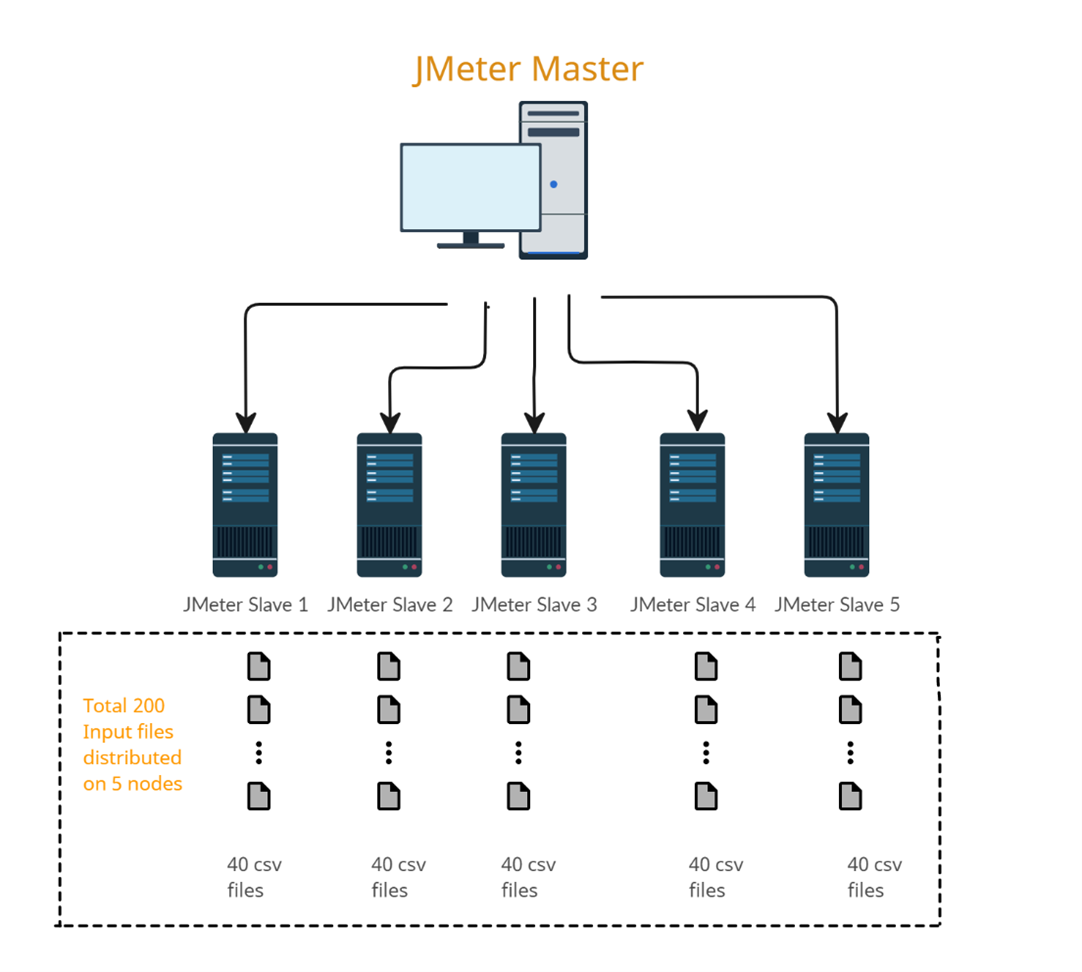
Figure 1.
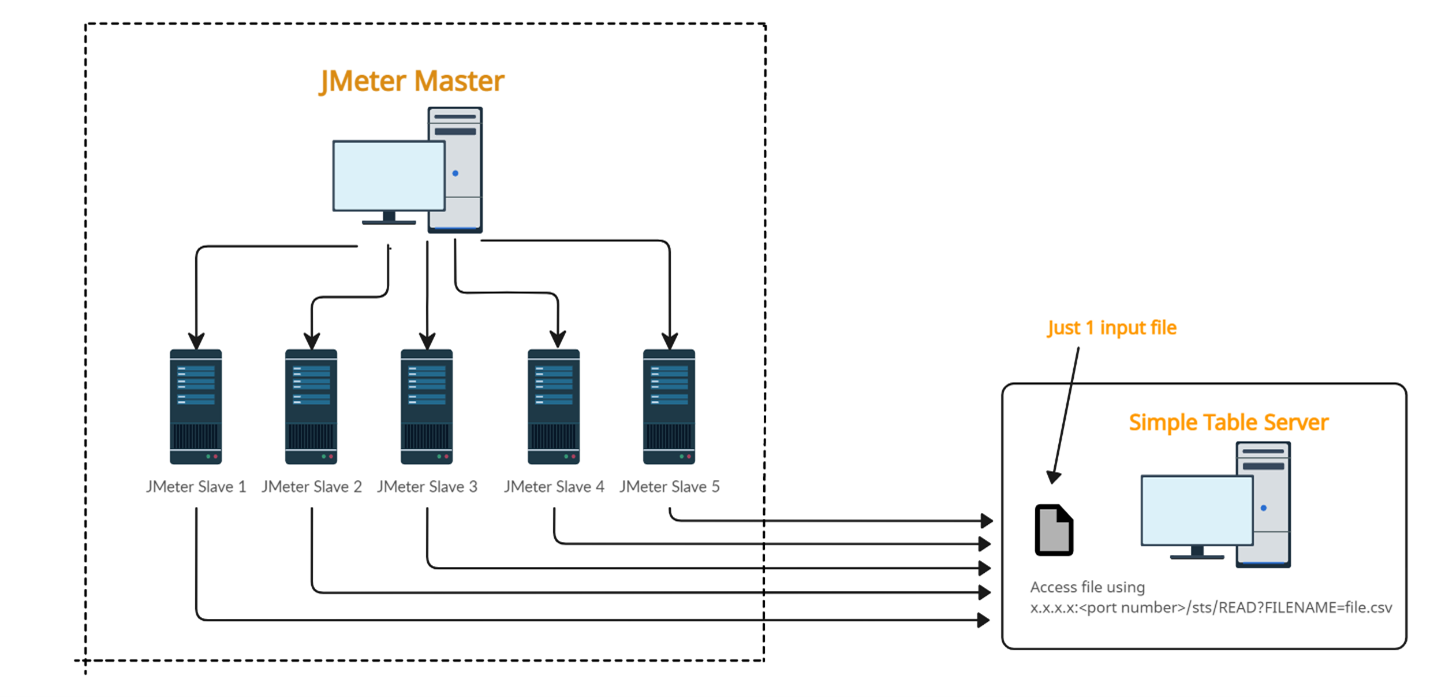
Figure 2.
Implementing STS can be done in just a few steps:
Step 1: Download and Install JMeter
To use the STS, you must have JMeter installed on your machine. You can download the latest version from the official website and follow the installation instructions.
Step 2: Download the STS Plugin
Once you have installed JMeter, download the STS plugin and install it by copying the JAR file to the "lib/ext" folder in your JMeter installation directory.
Step 3: Configure the STS
After installing the plugin, you need to configure the STS by adding the following properties in the jmeter.properties file.
In this example, I chose the dataset directory location at C:/jmeter_for_sts/dataset. You can select any location.
By default, the port is 9191, which you can change per your requirements.
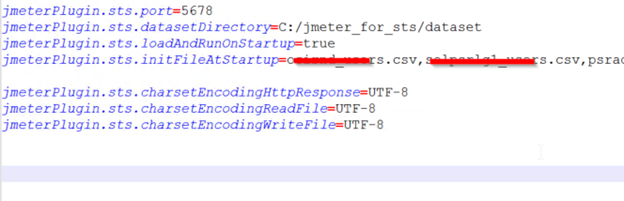
Figure 3.
Now we will create a CSV file with test data and upload it to the server (at the above “datasetDirectory” location).
The CSV file should contain the test data in subsequent rows as illustrated below:
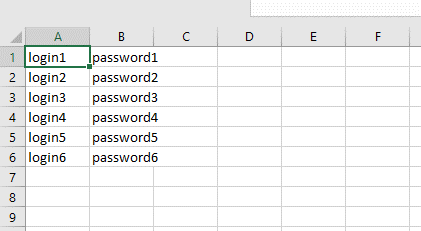
Figure 4.
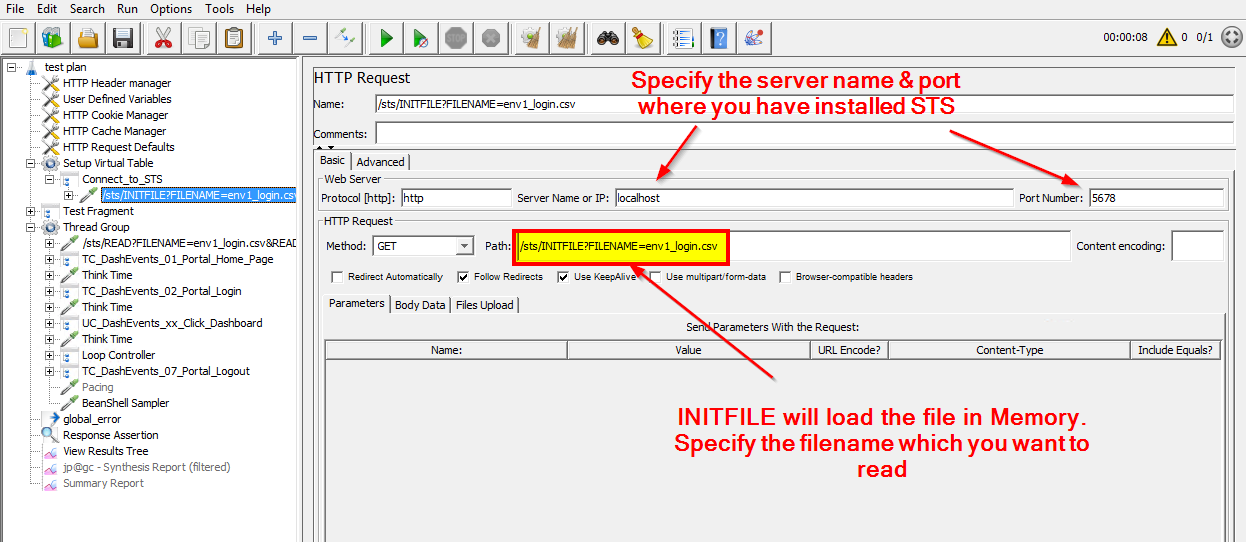
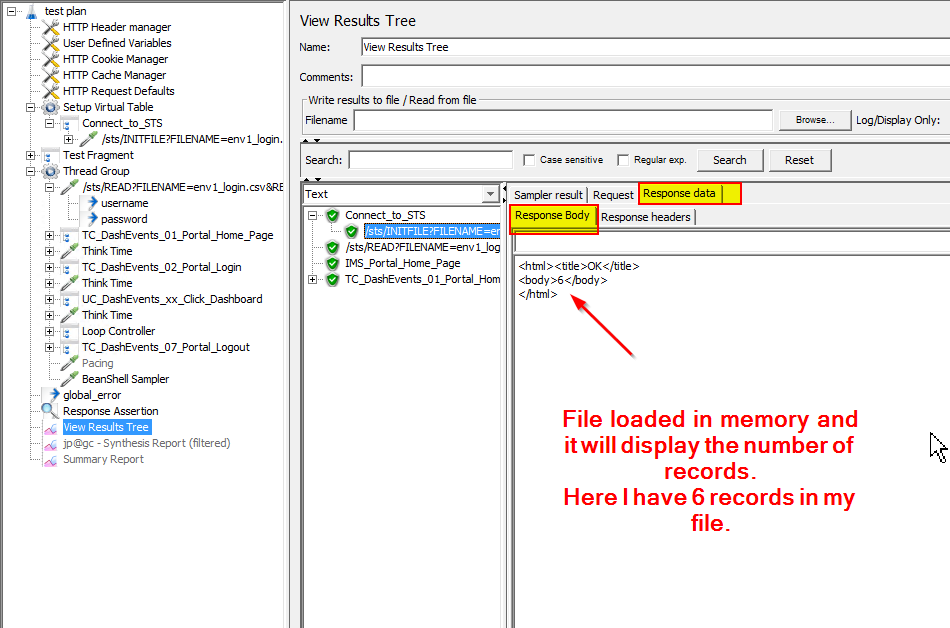
Now you can execute following command in your browser and it will display the number of records in the file: http://hostname:port/sts/INITFILE?FILENAME=env1_login.csv
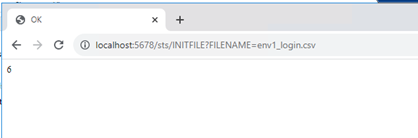
Figure 5. .
Step 4: There are various ways to start the STS. In this example, I am starting by using the simple-table-server.bat file. Go to JMeter’s bin directory and click on the “simple-table-server.bat” file.
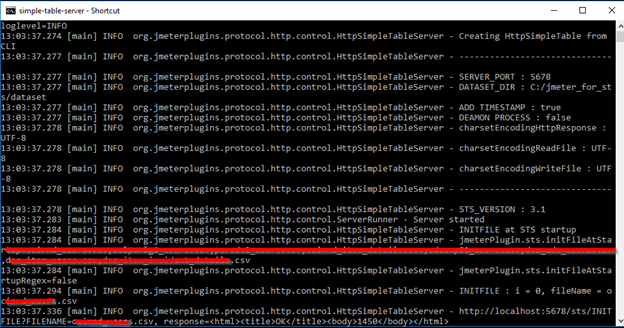
Figure 6.
Upon successful startup, you will see a screen like the one shown above with the server port number and the location of the file.
It will also load the list of files you specified in the initFileAtStartup parameter in jmeter.properties. As a best practice, always add your input files in the “initFileAtStartup parameter.” Files that are not mentioned will disappear when the STS restarts.
Now, try to access the URL IP address: <port>/sts.
It should give you the output below with all the commands related to the STS.
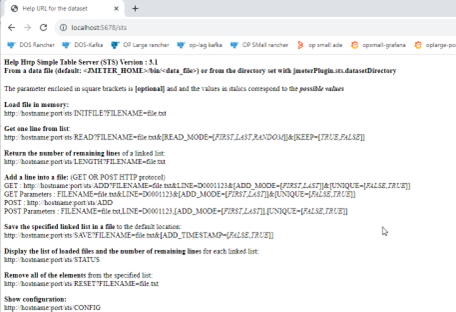
Figure 7.
Once you see this page, you have successfully configured the STS.
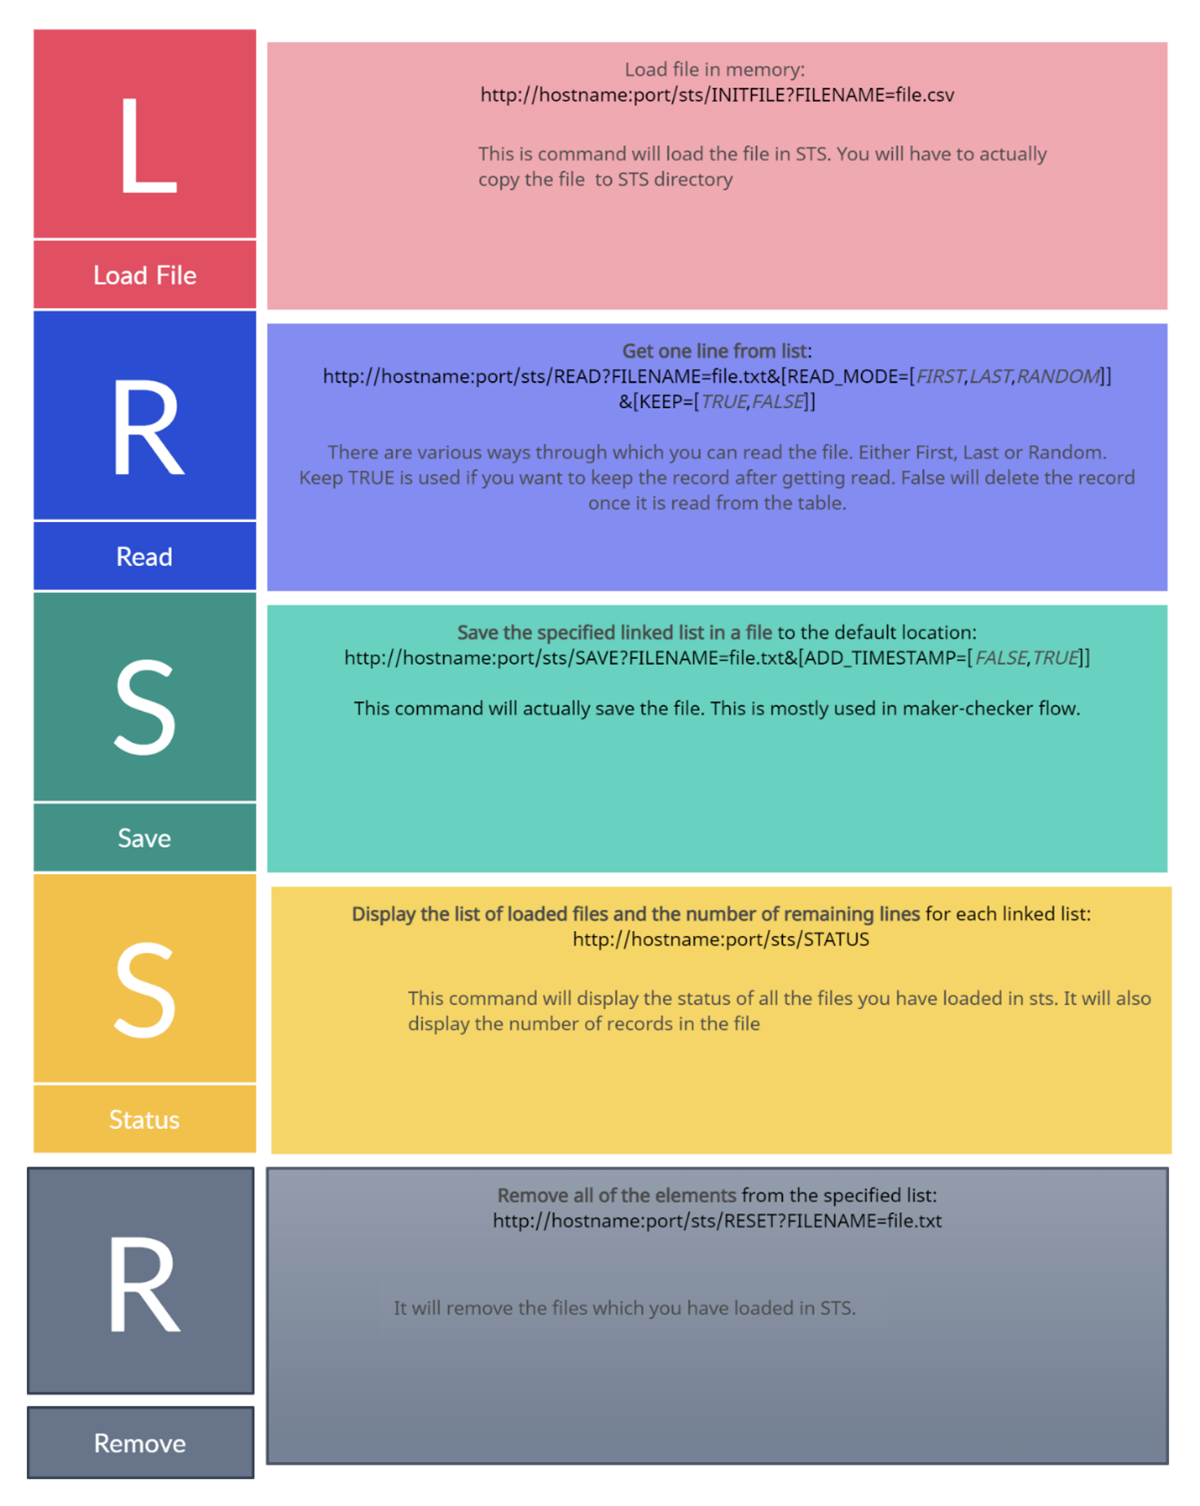
Figure 8.
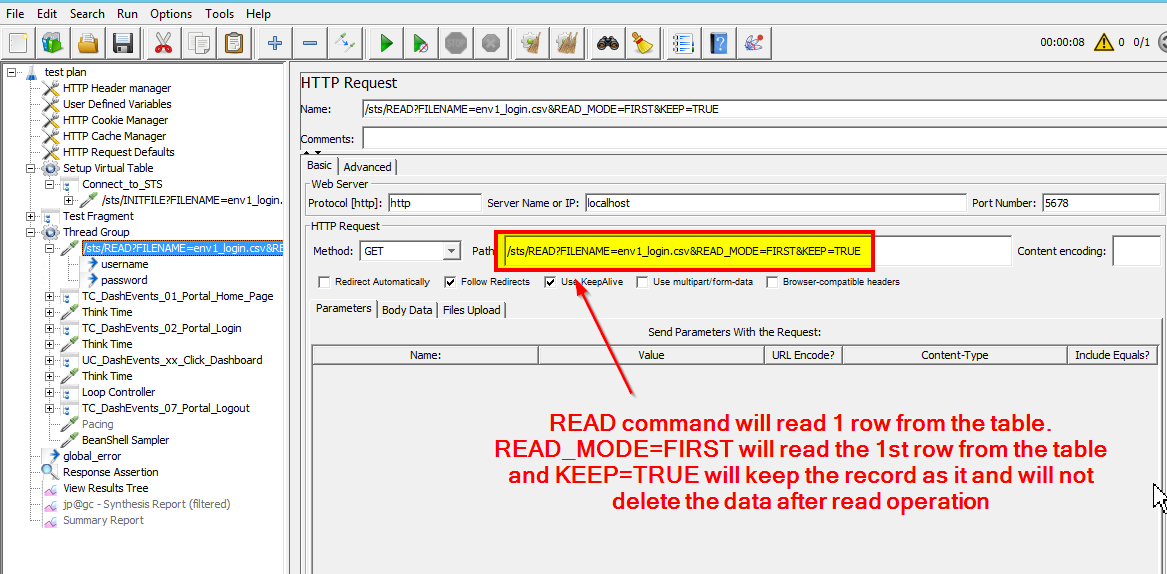
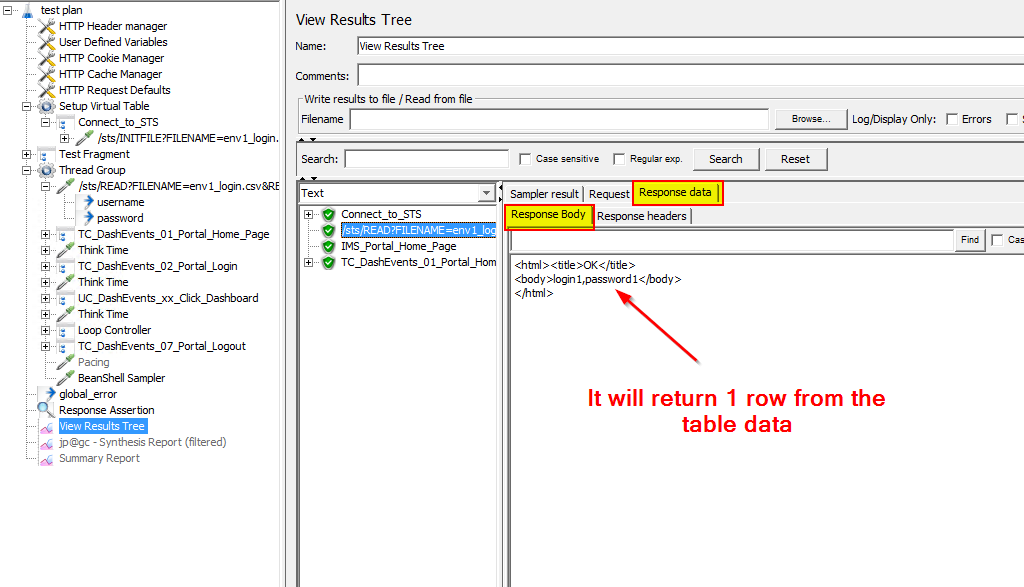
Assuming you followed the above steps and your STS is now fully up and running. Let’s try to implement this in your actual test plan. We will practice how one can read the STS data and use it in subsequent requests.
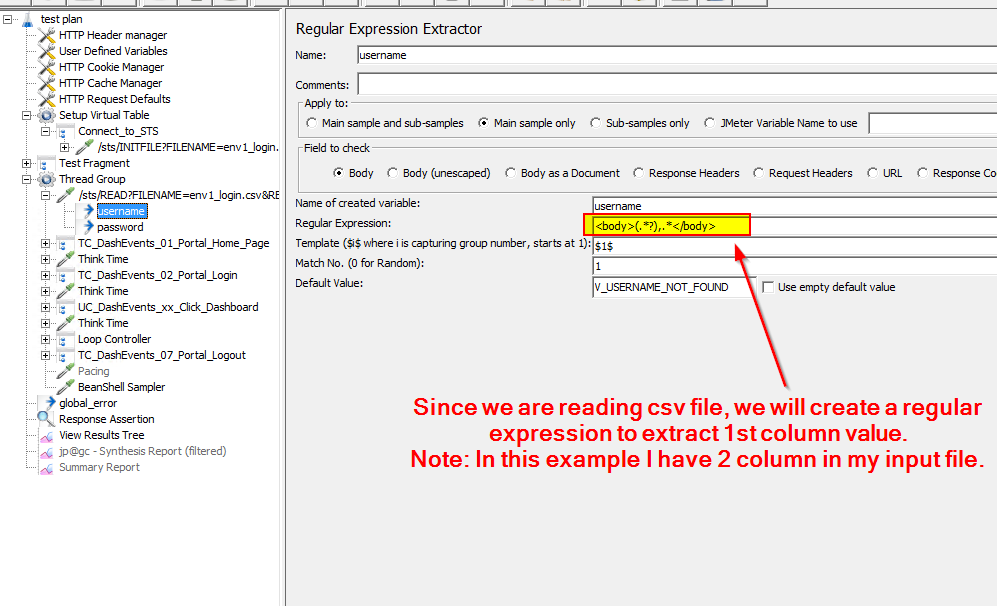
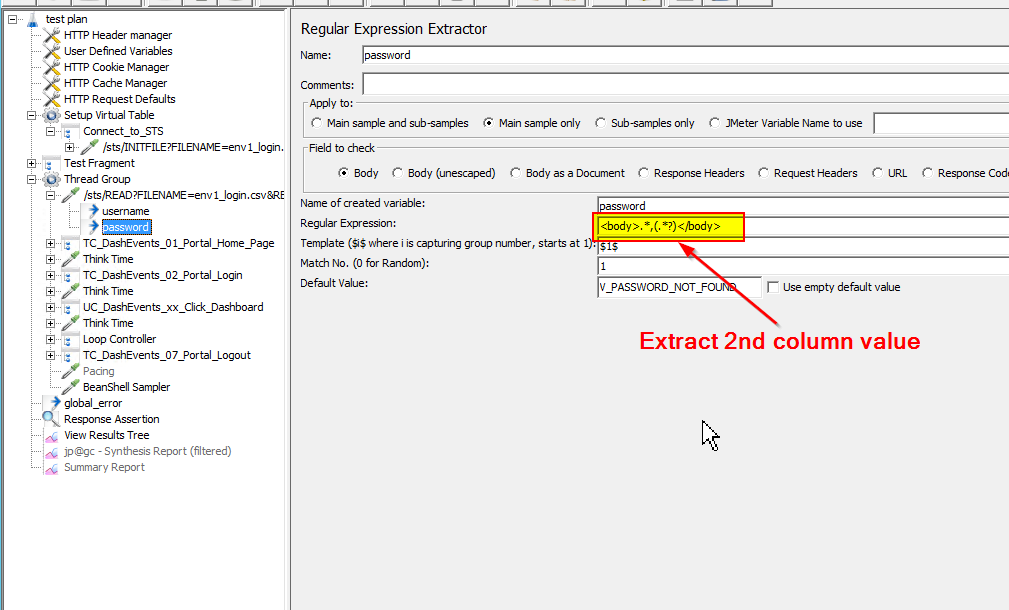 Likewise, you can read other parameters (if you have more column in the files).
 Now you can use these extracted parameters in subsequent requests, as needed.
The JMeter Simple Table Server is a useful feature that allows you to store and retrieve test data in a tabular format. It provides an easy-to-use interface for managing test data and can be used to simulate real-world scenarios in your JMeter test plans. By following the steps outlined in this blog post, you can easily implement the STS and start using it in your performance testing projects.