How To Run Self-Hosted Agents With Your Azure DevOps Pipeline

Microsoft Azure—Azure for short—is the Microsoft cloud services platform spanning IaaS, PaaS, and SaaS services from simple virtualized infrastructure to data warehousing, ML, and AI platforms.
The Azure DevOps service is one such SaaS offering that offers a fully featured DevOps platform consisting of:
These platforms are augmented by a vast collection of extensions to integrate third-party tools and platforms and extend the functionality. CI/CD pipeline is one of the core components to power a software development process provided by the Azure Pipelines service. Azure Pipelines provides the option to use Microsoft-hosted or self-hosted agents to run CI/CD jobs.
In this article, we will look at how to configure self-hosted Azure agents to be used in a pipeline.
(New to Azure DevOps? Start with our beginner’s guide.)
While it may seem a bit strange to use a self-hosted agent with Azure DevOps since it is a cloud-based service, but there are some significant benefits of opting to go with a self-hosted agent.
One reason is cost. Microsoft does offer:
Though sufficient for small-scale development, most users inevitably need more flexibility to run multiple concurrent builds and releases.
At the time of this article’s writing, a Microsoft-hosted agent cost $40 USD per agent while a self-hosted agent costs $15, both with unlimited minutes. Tthe self-hosted option provides cost savings when you need to scale up,even when youe add management overhead costs.
The second reason for choosing self-hosting is customizability. You havethe freedom to run the agent on any supported operating system, including Windows, Linux, and macOS. Microsoft hosted Azure agents allow you to select a specific image type, but are limited to only what is available from Microsoft.
You have the flexibility to configure agentsand can run multiple agents on a single host to maximize resource usage.
Setting up and running a self-hosted Azure agent is a relatively simple process, with the primary requirement being running the correct agent for the specified operating system and underlying architecture. In this section, we will see how to run agents on a Windows and a Linux VM.
Before you start the set-up process, ensure your machine is ready. You’ll need the following prerequisites:
The first step before setting up an agent is to create a personal access token which will be used to connect the agent to the Azure Pipeline.
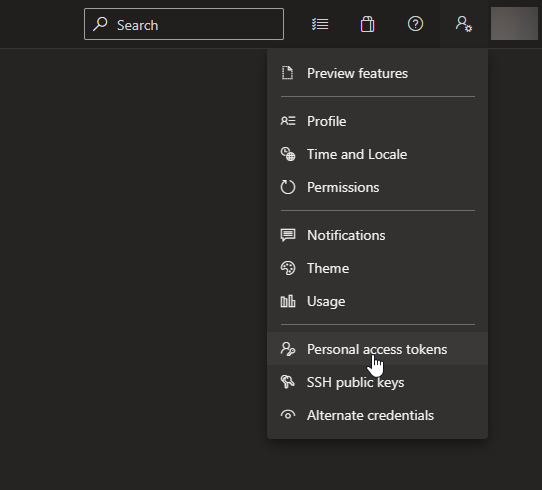
Step 1. Login to Azure DevOps organization, open user settings, and select "Personal access tokens"
 Open up your terminal window and change directory to the folder containing the downloaded file. Inflate the file to view the contents.
First, you need to generate the agent configuration file using the interacting configuration generator script.
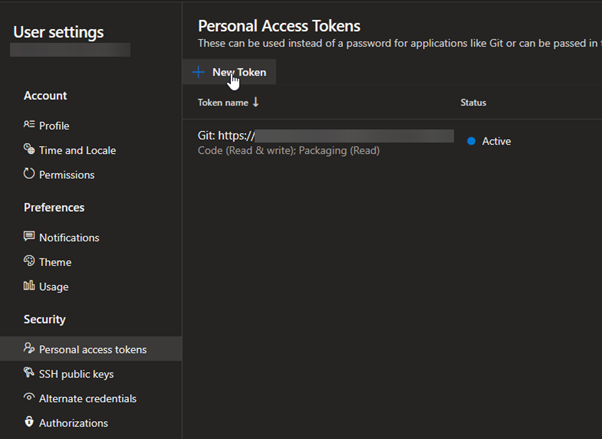
Step 2. In the Personal Access Tokens screen, click on “New Token” to create a token.
 Step 3. Provide a name, expiration date, and the necessary permissions and click on Create to create the PAT.
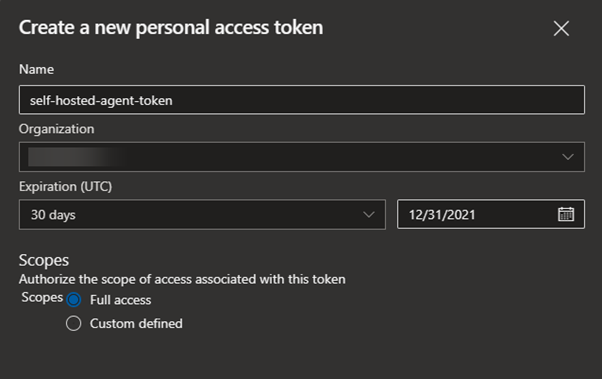
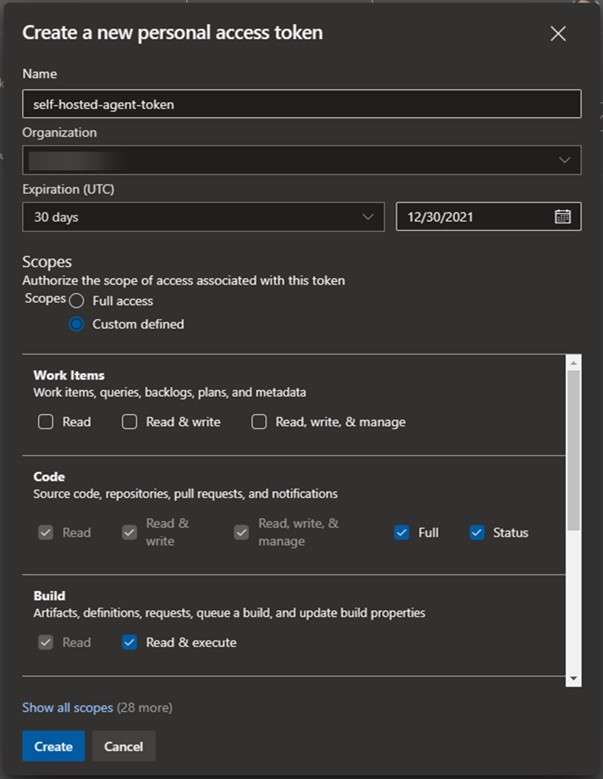 Note: Ensure that all the correct permissions are granted. Otherwise, you will not be able to initialize the connection. If required, you can configure the agent to have Full access to Azure DevOps.
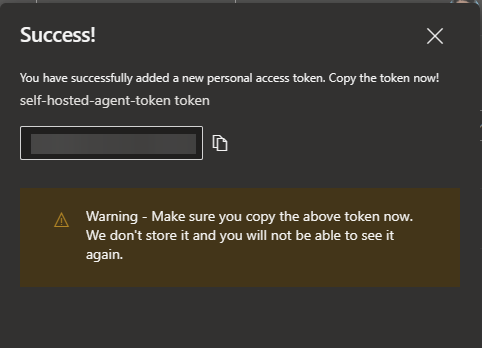
 Step 4. Once the token is generated, securely store it as it will not be accessible later.
Since we have created the token, we can now move into setting up the agent. Any agent configuration can be obtained via the Pipelines Agent pools section in the organizational settings in the Azure DevOps dashboard.
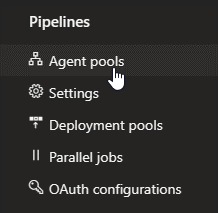
Step 1. Navigate to the Organization Settings and select Agent pools from the Pipeline section.
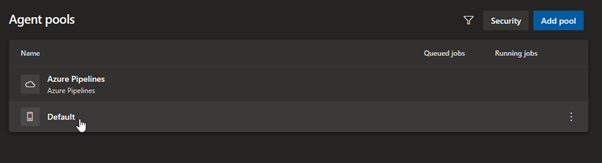
 Step 2. Select the Default agent pool. (If needed, select the agent to other available pools or create a new pool and add the agent.)
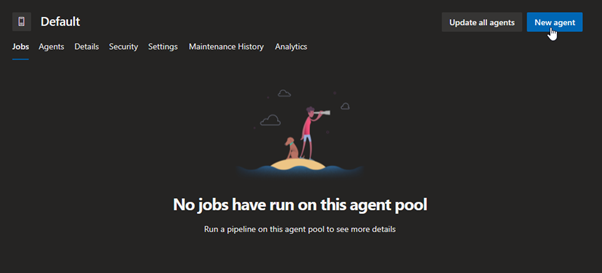
 Step 3. Click on the New Agent option to obtain the agent installation instructions.
 Step 4. Select the desired operating system and system architecture and follow the instructions provided.
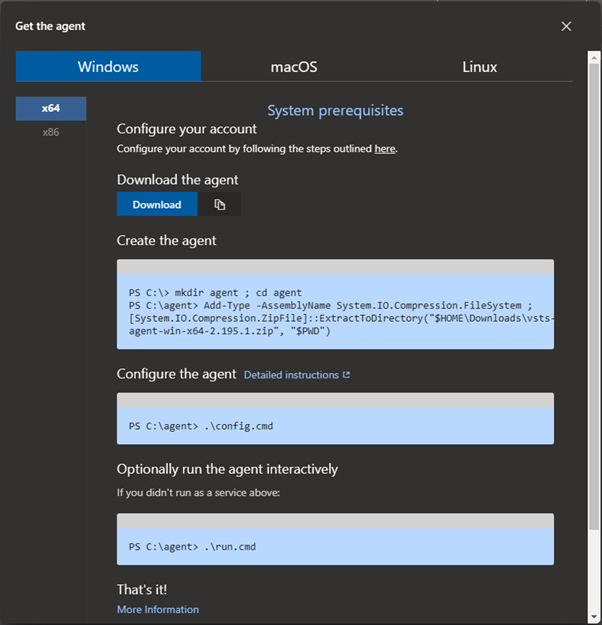
Let’s see how to install the Azure agent in Windows 10 on X64 architecture. Please refer to Microsoft’s official Windows agent guide for a complete list of prerequisites and specifications.
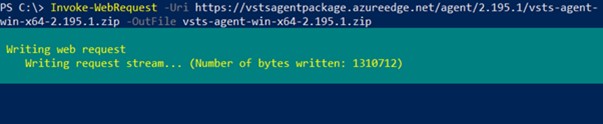
Step 1. Download the agent. (It will be downloaded as a zip file.)
Invoke-WebRequest -Uri https://vstsagentpackage.azureedge.net/agent/2.195.1/vsts-agent-win-x64-2.195.1.zip -OutFile vsts-agent-win-x64-2.195.1.zip
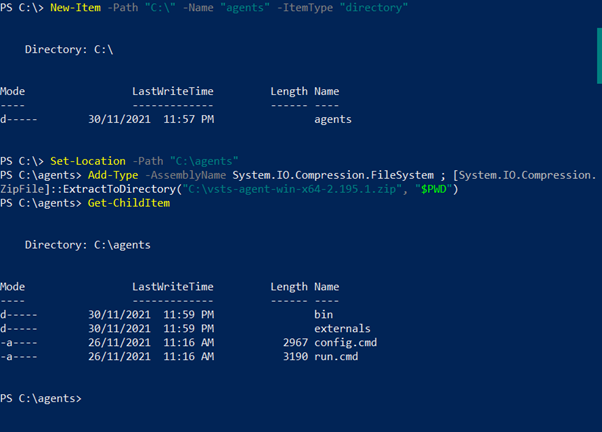
 Step 2. Extract the downloaded agent to the desired destination. It is recommended that the agent is extracted to a folder named agents in the root of the C drive (C:agents).
# Create directory and navigate to the directory
New-Item -Path "C:" -Name "agents" -ItemType "directory"
Set-Location -Path "C:agents"

# Extract the downloaded zip file
Add-Type -AssemblyName System.IO.Compression.FileSystem ; ::ExtractToDirectory("C:vsts-agent-win-x64-2.195.1.zip", "$PWD")

# Verify the extraction
Get-ChildItem
 Step 3. Start the agent configuration by running the following command. (It is recommended to use Elevated Powershell prompt.)
.config.cmd
 You will be required to enter configuration details such as:
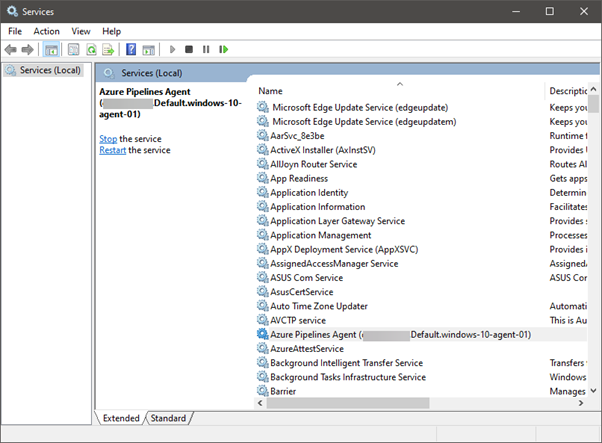
Finally, specify whether to configure the agent as a Windows service.
You will be able to see the configured Azure Pipelines Agent if you navigate to the Services section on Windows (services.msc).
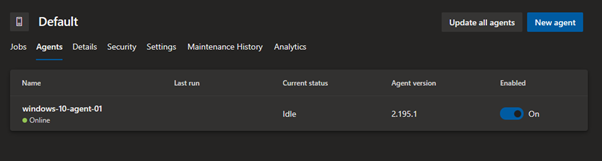
 Step 4. Navigate back to the Agent pools in the Organizational settings, and you can see the newly configured agent as the Default pool in the Agents tab.
Installing and configuring the pipeline agent in Linux is similar to Windows. So, in this section, let's see how to install the agent in an Ubuntu environment. Full configuration details are available in the Microsoft documentation.
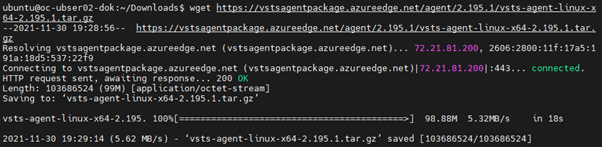
Step 1. Download the agent
wget https://vstsagentpackage.azureedge.net/agent/2.195.1/vsts-agent-linux-x64-2.195.1.tar.gz
 Step 2. Create a folder and extract the downloaded tar.gz file.
# Create directory and navigate to the directory
mkdir agent
cd agent

# Extract the downloaded zip file
tar zxf ~/Downloads/vsts-agent-linux-x64-2.195.1.tar.gz

# Verify the extraction
ls
 Step 3. Start the agent configuration by running the following command.
./config.sh
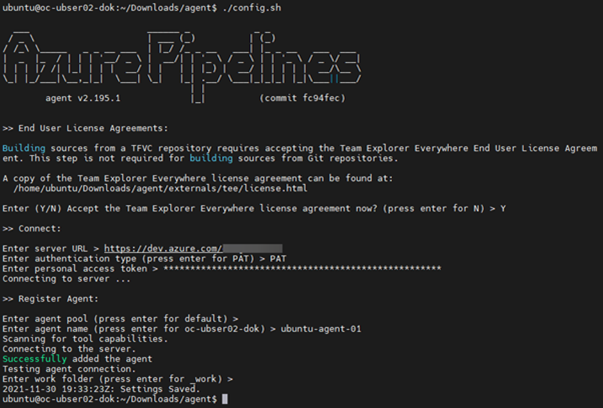 Similar to Windows configuration, the users will be asked to enter the server details, authentication type, and the authentication token we created earlier. Then configure the agent details, and finally, the user can start the agent by running the run.sh script.
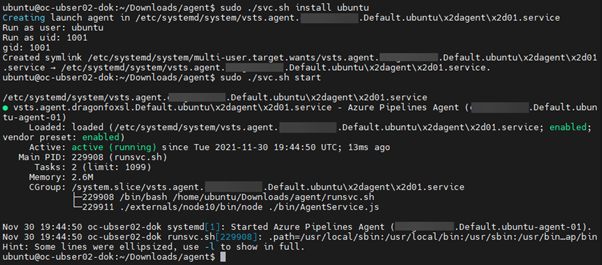
Step 4 (Optional). You can configure the agent to run as a system service using the svc.sh script located in the agent directory. Specify the user and use the install command to configure the service.
sudo ./svc.sh install ubuntu
sudo ./svc.sh start
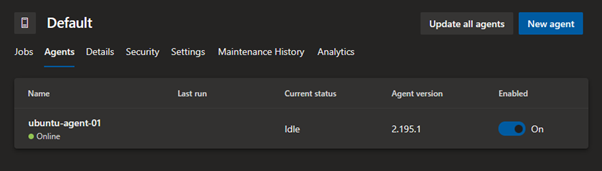
 Step 5. Navigate back to the Agent pools in the Organizational settings and then to the Default pool of the Agents tab to verify that the new Ubuntu agent is added as a self-hosted agent.
Running the agent as a container is another option we can use to run the agent. Both Windows and Linux are supported as container hosts.
In the following section, let's look at how to create a container image with the Azure pipeline agent and spin up the image as a container. We will be utilizing the Docker Desktop in a Windows environment to create a Linux (Ubuntu) based agent container.
Step 1. Create a folder named dockeragent and then create a Dockerfile within the folder with ubuntu:18.04 as the base image with the required configurations. (The configuration is available via Microsoft documentation.)
FROM ubuntu:18.04

# To make it easier for build and release pipelines to run apt-get,
# configure apt to not require confirmation (assume the -y argument by default)
ENV DEBIAN_FRONTEND=noninteractive
RUN echo "APT::Get::Assume-Yes "true";" > /etc/apt/apt.conf.d/90assumeyes

RUN apt-get update && apt-get install -y --no-install-recommends
ca-certificates
curl
jq
git
iputils-ping
libcurl4
libicu60
libunwind8
netcat
libssl1.0
&& rm -rf /var/lib/apt/lists/*

RUN curl -LsS https://aka.ms/InstallAzureCLIDeb | bash
&& rm -rf /var/lib/apt/lists/*

ARG TARGETARCH=amd64¬¬
ARG AGENT_VERSION=2.194.0

WORKDIR /azp
RUN if ; then
AZP_AGENTPACKAGE_URL=https://vstsagentpackage.azureedge.net/agent/${AGENT_VERSION}/vsts-agent-linux-x64-${AGENT_VERSION}.tar.gz;
else
AZP_AGENTPACKAGE_URL=https://vstsagentpackage.azureedge.net/agent/${AGENT_VERSION}/vsts-agent-linux-${TARGETARCH}-${AGENT_VERSION}.tar.gz;
fi;
curl -Ls¬S "$AZP_AGENTPACKAGE_URL" | tar -xz

COPY ./start.sh .
RUN chmod +x start.sh

ENTRYPOINT
Step 2. Create the startup script (start.sh) and put it within the same folder. Ensure that the line endings are configured as Unix-style (LF) line endings.
fi

AZP_TOKEN_FILE=/azp/.token
echo -n $AZP_TOKEN > "$AZP_TOKEN_FILE"
fi

unset AZP_TOKEN

if ; then
mkdir -p "$AZP_WORK"
fi

export AGENT_ALLOW_RUNASROOT="1"

cleanup() {
if ; then
print_header "Cleanup. Removing Azure Pipelines agent..."

# If the agent has some running jobs, the configuration removal process will fail.
# So, give it some time to finish the job.
while true; do
./config.sh remove --unattended --auth PAT --token $(cat "$AZP_TOKEN_FILE") && break

echo "Retrying in 30 seconds..."
sleep 30
done
fi
}

print_header() {¬
lightcyan='�33[1;36m'
nocolor='�33[0m'
echo -e "${lightcyan}$1${nocolor}"
}

# Let the agent ignore the token env variables
export VSO_AGENT_IGNORE=AZP_TOKEN,AZP_TOKEN_FILE

source ./env.sh

print_header "1. Configuring Azure Pipelines agent..."

./config.sh --unattended
--agent "${AZP_AGENT_NAME:-$(hostname)}"
--url "$AZP_URL"
--auth PAT
--token $(cat "$AZP_TOKEN_FILE")
--pool "${AZP_POOL:-Default}"
--work "${AZP_WORK:-_work}"
--replace
--acceptTeeEula & wait $!

print_header "2. Running Azure Pipelines agent..."

trap 'cleanup; exit 0' EXIT
trap 'cleanup; exit 130' INT
trap 'cleanup; exit 143' TERM

# To be aware of TERM and INT signals call run.sh
# Running it with the --once flag at the end will shut down the agent after the build is executed
./run.sh "$@" & wait $!
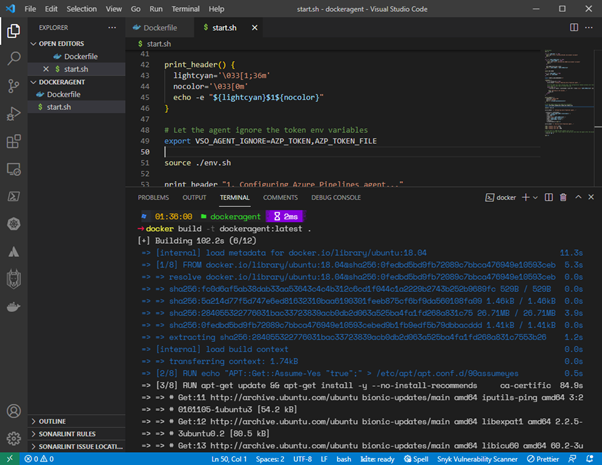
Step 3. Build the Image by running the following command in the dockeragent folder.
docker build -t dockeragent:latest .
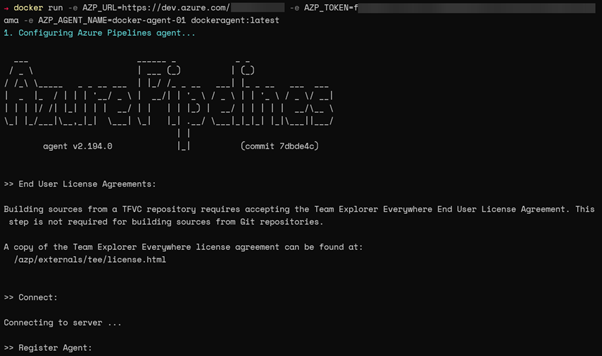
 Step 4. Create a container using the docker run command with the newly created docker image. We can pass environment variables when creating the container. In this instance, we will be passing the server URL (AZP_URL), PAT token (AZP_TOKEN), and agent name (AZP_AGENT_NAME) as variables.
docker run -e AZP_URL=https://dev.azure.com/ -e AZP_TOKEN= -e AZP_AGENT_NAME=docker-agent-01 dockeragent:latest
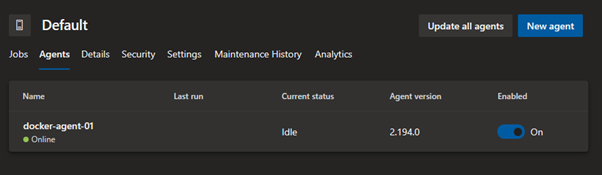
 Step 5. We can verify if the container is added as an agent by looking at the Default agent pool in the Azure DevOps dashboard.
Self-hosted agents in Azure DevOps Pipelines offer cost savings and more flexibility to configure and run build and release agents in any supported environment. These pipeline agents can be used to extend the functionality of the CI/CD pipeline from running in bare-metal servers to VMs and even as containers.